
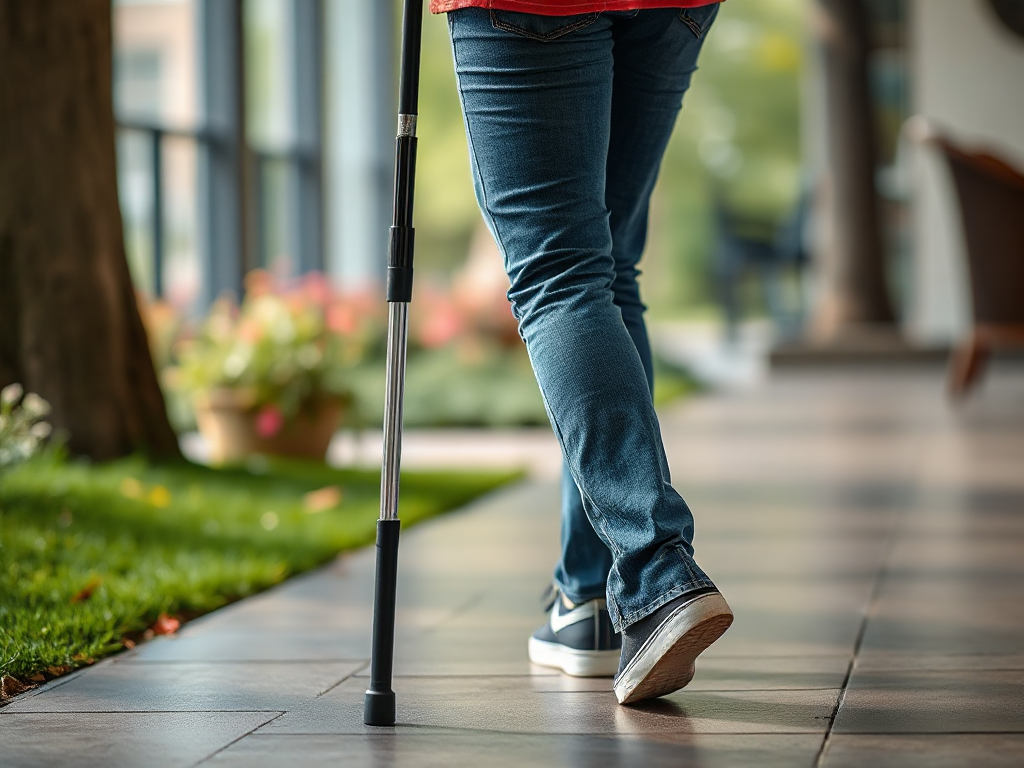
How to use a cane without shifting pain to another joint depends on matching the cane to the opposite side of the weaker or painful leg, setting the handle near wrist height, and keeping your elbow slightly bent. Move the cane forward with the affected leg, then step through with the stronger leg instead of leaning heavily through your shoulder or bending sideways. A cane that is too tall, too short, held on the painful side, or used with a wide swinging motion can overload the wrist, elbow, shoulder, back, or opposite hip. Pain that persists, worsening balance, numbness, or difficulty bearing weight calls for a clinician or physical therapist to check the device and walking pattern.
Choose the Side and Set the Cane Height
A standard cane usually belongs in the hand opposite the painful or weaker leg. If the right knee is sore, hold the cane in the left hand; if the left hip is limiting your stride, use the right hand. This arrangement allows the cane and affected leg to share support while the trunk stays more centered. Holding the cane on the painful side may feel intuitive, but it often places the device too far from the body and encourages leaning, twisting, or a shortened stride.
Height affects nearly every other part of the walking pattern. Stand upright in supportive shoes with the arm relaxed at your side. The cane handle should generally line up with the crease of the wrist, allowing the elbow to remain slightly bent when the hand grips it. The exact fit can vary with body proportions and the cane design, so comfort and controlled posture matter more than forcing a measurement. A handle that is too low makes you hunch and load the wrist; one that is too high can lift the shoulder and create neck or upper-back tension.
Check the rubber tip before relying on the cane outdoors. A worn, split, or slippery tip can cause a sudden catch, leading you to grip harder or lurch onto the opposite leg. The handle should not rotate under pressure. Someone with hand arthritis may tolerate a broader, contoured handle better than a narrow straight grip, although a specialized design does not replace proper height.
Try the adjustment beside a counter rather than on an open floor. Walk several steps and notice whether your shoulder rises, your elbow locks, or your torso leans toward the cane. Those are signs to reassess the setup. A cane is meant to provide a modest, predictable support point—not to become a crutch that carries most of your body weight. For related mobility considerations, see How to use a cane without shifting pain to another joint.
Use a Walking Sequence That Limits Compensation
The basic sequence is cane first, affected leg second, stronger leg third. Move the cane a short distance forward, place the affected foot beside or slightly behind the cane, and then step through with the stronger leg. This gives the painful side a stable point to share the load during the transition. Keep the cane close enough to your body that your elbow remains softly bent and your shoulders stay level.
Small movements are usually safer than a long reach. A cane planted too far ahead can pull your trunk forward and force the wrist and shoulder to absorb a braking load. A cane placed too far out to the side can make you lean and compress the opposite side of the lower back. Think of placing the tip where you can maintain balance without stretching your arm. The cane and affected foot should move as a coordinated pair, not as separate guesses.
Consider a person with right knee pain who takes a long step with the left leg after planting the cane. If the cane is left behind, the right knee must accept more body weight during the transfer. If the person swings the cane widely, the left shoulder and trunk may do the compensating instead. A shorter sequence, slower pace, and deliberate weight transfer are more useful than trying to preserve normal walking speed.
Practice on a clear, level surface while wearing the shoes used most often. Look ahead rather than staring continuously at the tip, but glance down when approaching a threshold or loose surface. Breathe normally and avoid clenching the handle. A tight grip can irritate the hand and forearm, while a locked elbow sends impact toward the shoulder. If a cane feels necessary on both sides or you cannot move through this sequence without substantial pain, a physical therapist may determine whether a walker or another aid is more appropriate.
Recognize Load Shifting and Correct the Pattern
New pain in the wrist, elbow, shoulder, opposite hip, or lower back often means the body is compensating for an inefficient cane pattern. The device may be taking too much load, or the painful leg may be avoiding contact so completely that another region must stabilize every step. Relief in one joint is not a success if the replacement stress is persistent or increasing.
Watch for a few specific clues: the cane tip lands far from your foot, the shoulder on the cane side stays elevated, the trunk tilts with every step, or the hand becomes numb after a short walk. A cane that skids or rattles can make you grip harder. A cane that is too short often produces a forward bend; a cane that is too tall may cause a shrugging motion. Correcting height and placement should come before trying to strengthen through the discomfort.
Use a brief self-check after walking indoors. Ask whether your steps are becoming shorter, whether you are holding your breath, and whether the opposite leg is receiving a hard, abrupt landing. Video from the side can reveal a lean that is difficult to feel. The goal is not a perfectly symmetrical gait immediately; it is a controlled pattern in which the cane reduces stress without creating a new repetitive strain.
A common mistake is treating every increase in pain as proof that the cane is harmful. Sometimes the underlying joint remains irritated, and the device is exposing how much support is still needed. The better test is whether the pain settles when the cane is adjusted, the pace slows, or the walking distance is reduced. If symptoms continue after those changes, stop extending the trial and arrange an assessment. A cane should not be used to push through sharp pain, new swelling, or a sense that the leg may give way.
Handle Stairs, Turns, and Uneven Ground Safely
Level walking is only part of cane use. Stairs change the timing because the body must manage height as well as forward motion. When a handrail is available, use it and keep the cane in the other hand if that arrangement is stable. A commonly taught sequence is “up with the stronger leg and down with the affected leg,” but the exact method depends on strength, balance, the staircase, and professional instruction. Move one step at a time rather than trying to maintain a normal alternating rhythm.
On a turn, avoid pivoting sharply around the painful leg while the cane remains fixed behind you. Take several small steps and reposition the cane with each change in direction. Sudden twisting can shift force into the knee, hip, ankle, or lower back. At a doorway, pause long enough to place the cane beyond the threshold rather than catching the tip on the raised strip.
Uneven sidewalks and wet floors expose weak technique quickly. Plant the cane on a firm surface and test unfamiliar ground before transferring weight. A single-point cane may be adequate inside but less reassuring outdoors, especially where cracks, gravel, or slopes are common. A quad cane can offer a broader base, but it is heavier and may be awkward on stairs or during quick turns. More support is not automatically better if the device slows foot clearance or encourages dragging.
- Clear loose rugs, cords, and clutter from regular walking routes.
- Use lighting that makes thresholds and floor changes visible.
- Wear shoes with a secure fit rather than loose slippers.
- Keep one hand available for a rail when the environment demands it.
These adjustments reduce the temptation to yank the cane, overreach, or rush. If outdoor surfaces routinely cause instability, discuss a different mobility aid rather than relying on stronger arm pressure through a single cane.

Know When a Cane Is Not Enough
A cane is most useful when one side needs limited support and you can still control the leg, maintain balance, and follow a consistent sequence. It may be the wrong tool when both legs are significantly weak, coordination is impaired, dizziness is present, or the painful leg cannot safely accept partial weight. In those situations, using a cane longer or pressing harder through it may increase fall risk and overload the upper body.
Seek prompt medical advice for sudden inability to bear weight, a major increase in swelling, deformity, severe pain after a fall, new numbness or weakness, or chest symptoms and shortness of breath. These signs need more than an equipment adjustment. A clinician can also evaluate persistent pain that moves to another joint, because the new symptom may reflect a separate problem rather than simple cane technique.
A physical therapist can observe the entire sequence: standing up, starting, turning, stepping over thresholds, and sitting down. That matters because many people walk acceptably on a straight hallway but lose control during transitions. The assessment may lead to a different cane height, a different hand, temporary use of a walker, or exercises aimed at the hip, ankle, or trunk. Such changes should be based on observed function rather than a general assumption that the lightest aid is always preferable.
Keep a short record for several days: where the cane was used, which joint hurt, how long you walked, and whether symptoms appeared during or after activity. The pattern can distinguish a setup problem from excessive distance or an untreated condition. Review the cane positioning and walking sequence after any change in footwear, flooring, or joint symptoms. The practical priority is steady, controlled movement with the least compensatory strain—not speed or independence at any cost.
For device-fitting and mobility advice, readers can consult patient education from a local hospital, rehabilitation service, or licensed physical therapist. Those sources can demonstrate stair technique and assess whether a standard cane, quad cane, or walker matches the person’s balance and weight-bearing needs.
Frequently Asked Questions
Which hand should hold a cane for a painful knee?
Hold it in the hand opposite the painful or weaker knee. This lets the cane and affected leg share support while reducing trunk leaning.
Can a cane cause shoulder or wrist pain?
Yes. Excessive gripping, a locked elbow, incorrect height, or leaning heavily onto the cane can transfer stress to the wrist, elbow, shoulder, and neck.
How far ahead should a cane be placed?
Place it a short, comfortable distance ahead and slightly to the side, close enough to keep your elbow gently bent and your torso upright.
Should the cane move with the painful leg?
Usually, yes. Move the cane forward with the affected leg, then step through with the stronger leg. Slow down if the sequence becomes rushed or unstable.
When should someone replace a cane with a walker?
A walker may be more suitable when both sides are weak, balance is poor, the leg cannot bear partial weight, or a cane does not prevent leaning and instability.
Conclusion
Safe cane use depends on alignment, timing, and honest attention to what the rest of the body is doing. Hold the cane opposite the painful leg, adjust the handle so the elbow stays slightly bent, and use short coordinated steps rather than reaching or leaning. Shoulder tension, hand numbness, back soreness, or new discomfort in the opposite hip are useful warning signals that the setup or walking pattern needs review. Practice transitions and uneven surfaces more cautiously than level hallway walking, and do not use a cane to force activity through sharp pain or instability. If the device provides too little control, or if symptoms persist despite adjustments, a physical therapist or clinician can match the aid to your actual strength and balance.
Further Reading
Authoritative Sources
- Avoiding The Most Common Mistakes with Walking Canes
chipperfieldphysio.caWhen walking with a cane, it should swing and strike the ground at the same time as your opposite foot. This method offers the most support and ...
- How to Use a Walking Cane Correctly: Prevent Falls & Pain
walking-canes.netStand with feet hip-width apart, cane in the hand opposite the weak leg. Place the cane forward about one foot, then step forward with the weak ...
- Common Mistakes Made When Using a Cane
fashionablecanes.comThe main mistake is not following the correct rhythm. You always want your cane supporting your weaker leg, like with regular walking. Your stronger leg should ...
- Tips for choosing and using canes
mayoclinic.orgHold your cane in the hand that's opposite your affected leg. Move the cane along with that leg, so each time you step, you move the cane too. ...